User manual and frequently asked questions ACCESS STEAM DW2460+61+62+63
The Rowenta Access Steam iron is the perfect solution for all your garment care needs, with powerful steam and convenient features that make ironing easier every day. This high-performance steam iron comes equipped with a cordreel function for easy storage and a stainless steel soleplate featuring advanced Microsteam technology, with over 350 active micro-holes to ensure maximum steam coverage.
Reference : DW2461U1
Voir les documents liés
Documentation
Voir les questions les plus fréquentes
FAQ
The board should be perforated to allow the steam to pass through the fibres of the fabric to soften it and make ironing easier. The ironing board cover should also be suitable to allow the flow of steam through.
• You are not using the right type of water (Refer to the FAQ "What water should I use for ironing?").
• You have used a starch type product on your laundry (Always spray to the reverse side of the fabric to be ironed and clean your iron afterwards).
• Fibers from clothes have been trapped in the holes in the iron and have become carbonised.
• The clothes have not been rinsed enough and there is detergent left on them or you have ironed a new item of clothing before washing it.
• See the instructions for use to find out what type of water is appropriate and clean the soleplate from time to time with a damp sponge.
Your iron has a built-in thermostat controlling the temperature very precisely over the entire surface of the soleplate. The thermostat dial contains international markers with dots corresponding to three ironing temperatures.
Make sure that you use the right temperature for your clothes:
• Marker with 1 dot for synthetic fabrics.
• Marker with 2 dots for wool and silk.
• Marker with 3 dots for cotton and linen.
• The temperature button must be placed on Steam area (between 2 dots and MAX).
• Use steam only when the iron is hot (the light must be off).
To do this, set the iron temperature button to the maximum position.
• Leave the item on a hanger and gently pull the fabric with one hand.
• Press the steam control button intermittently and move the iron from top to bottom.
As the steam produced is very hot, it softens the fibres and removes creases.
Note: Never use the vertical steam function on an item being worn by anyone.
At the end of your ironing session, we would suggest that once your iron has cooled down, you should wipe over the soleplate and around the steam holes to remove any burned fibers that may have started collecting around the steam holes.
• Always place your iron on its heel rest or its base (depending on model).
• Avoid ironing over abrasive items (buttons, zip fastenings, etc.).
• Never clean your iron's soleplate with abrasive or metallic pads.
If ironing mixed-fibre fabrics, set the temperature for the most fragile fibre.
Important: The iron takes longer to cool down than to heat up. We recommend that you start with fabrics to be ironed at a low temperature.
Leave the iron to cool down before putting it away and follow these 4 tips:
Empty out the water remaining in the tank, set the thermostat to minimum, switch off the steam control and stand it upright or put it back in its base (depending on the model).

* Depending on model
Set the thermostat control to Max and the steam control on DRY and switch on.
Place the iron on its heel and leave to heat up for around 5 minutes.
Unplug the iron then hold your iron horizontally above the sink.
Remove the anti-scale valve (or set the control to self-clean/autoclean depending on the model). Steam, water and scale deposits will leave the steam chamber through the steam holes and the iron will be clean.
At the end of the operation, push the anti-calc valve back into position. When your iron is cold, you will also be able to use your vacuum to gently suction limescale and dirt that may have clogged the holes in the soleplate.
After use, empty the tank, close the steam control, set the thermostat to minimum and stand the iron upright or place it on the base (depending on model).
Cleaning:
Use a damp soft cloth to wipe your iron and never use cleaners or solvents.
If your iron has an auto-clean function, refer to the instruction manual before using it.
Tips:
• Always use untreated water in your iron. If your water is very hard, we recommend you use a mix of 50% untreated tap water and 50% distilled water.
• Avoid placing your iron on sharp objects such as zip fasteners and metal buttons.
• Do not put your iron down flat on rough surfaces.
• Above all, never leave a hot iron unattended.
This is not only to avoid overheating of the iron or the surface on which it is placed but also to ensure that no-one gets burned. If safety is one of your main concerns, choose an iron that has an automatic cut-off function.
Never leave a hot iron within reach of children or pets who risk knocking it over and injuring themselves.
• Like any electrical appliance, never put your iron in water.
• Do not use an iron that has fallen down or has a damaged power cord. If you have the slightest doubt concerning the condition of your iron, contact the Service Centre.
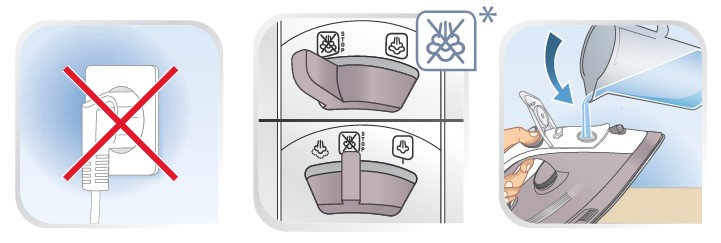
• Always unplug your iron before leaving it, cleaning it or filling it with water (unless it is a model that has a removable water tank). Regularly check the water level to ensure that there is always enough.
• Self-cleaning: heat the iron, unplug it, remove the anti-calc valve and spray the iron over the sink.
• Cleaning the anti-calc valve: Remove the antiscale valve and soak the valve in a cup of white vinegar or plain lemon juice for 4 hours.
If your iron has an anti-calc system, you should clean the anti-calc valve once a month.
To do this:
• Unplug the iron and leave it to cool for 30-45 minutes.
• Empty the water and remove the valve, holding it by the top.
• Let the anti-calc valve soak for 4 hours in a glass of natural lemon juice or citric acid, then thoroughly rinse the anti-calc valve under tap water.
• Reposition the anti-calc valve into your iron. Warning! Never touch the end of the anti-calc valve.
Regularly clean the soleplate with a damp, non metallic washing up pad. For easier, non-corrosive cleaning of your iron's soleplate, use a damp sponge on the soleplate while it is still warm.
If cleaning dirt off is an issue, use the stick which is made specifically for cleaning the Durillium soleplates.
• The stainless soleplate:
Clean the soleplate of your iron when it is cool with a damp cloth or a non-abrasive sponge.
• The autoclean soleplate:
It is recommended that you use a soft damp cloth on the warm soleplate, in order not to damage the surface.
Warning: The use of iron cleaner will cause damage to your soleplate's autoclean coating.
• There is no power in the mains socket: check that the plug is properly connected, or try to plug the iron into a different socket.
• Temperature control set too low: set the temperature control to a higher temperature.
• The automatic electronic cut-out* is active: move your iron.
* depending on model
• The tank is empty or almost empty: add more water.
• The selected temperature is too low and does not allow steam to be produced: set the thermostat to the steam zone (between 2 dots and MAX).
• If your iron has a Dry/Steam control: set it to the Steam position.
• Scale has built up in your iron: descale it.
• Your iron has an intelligent system (a moving sensor) which temporarily stops steam being released when the iron is not moving, even when it is placed horizontally. This function eliminates wasted steam while you are handling the clothes.
• The tank is empty or almost empty: add more water.
• The selected temperature is too low to use this function: set the thermostat to the zone between 3 dots and MAX.
The "supersteam" or "turbo" function should not be used intensively – wait a few seconds between pressing the button.
Or, you have over-filled your iron – do not go beyond the "MAX" level on the tank.
Gently shake your iron to reactivate it, the lights should start to flash and then the iron should start to heat up.
The electronic system cuts off the power supply and the auto-stop light flashes if the iron is not moved for more than 8 minutes (on its rest or base) or is left flat for more than 30 seconds.
To turn the iron back on, shake it gently until the light goes out.
Voir les produits


